Sanity
How to Automate Blog Publishing with Sanity, n8n, and Next.js
Learn how to automate blog publishing using Sanity, n8n, and Next.js. This tutorial walks through building a fully automated content pipeline—from authoring to live deployment.
If you've ever spent a Friday afternoon manually copying a blog post from a Google Doc into your CMS, tweaking slugs, uploading images, hitting publish, and then waiting for your site to rebuild — you already know the pain. Manual blog publishing is slow, error-prone, and doesn't scale. The good news: you can automate blog publishing end-to-end using three powerful tools — Sanity, n8n, and Next.js — without writing a custom backend from scratch.
In this tutorial, you'll build a fully automated content pipeline. Content authors write in Sanity Studio. An n8n workflow detects new or updated posts, optionally enhances them with AI, and triggers on-demand revalidation of your Next.js site. The result: zero-touch publishing that is fast, consistent, and auditable.
The Case for Blog Automation
Manual publishing workflows are a hidden tax on engineering and content teams alike. Here's why automation pays off:
- Time savings. A single publish cycle — review, format, upload, deploy — can take 20–40 minutes. Multiply that by 10 posts a month and you're losing nearly a full workday.
- Consistency. Automated pipelines enforce the same steps every time: slug formatting, SEO field validation, image optimization. No more "oops, forgot the meta description."
- Reduced errors. Human copy-paste introduces typos, broken links, and missing fields. Automation catches these at the workflow level before they reach production.
- Team scalability. When publishing is automated, a single developer can support a content team of 20. Writers publish; engineers don't babysit deploys.
- Scheduled publishing. Want a post to go live at 9 AM on a Tuesday? With an automated pipeline, that's a one-line config change, not an alarm clock.
The investment in setting up automation is typically recovered within the first month of operation.
Architecture Overview (Sanity + n8n + Next.js)
Before writing any code, it helps to understand how the three tools fit together.
Sanity is your headless CMS and content lake. Authors create and edit posts in Sanity Studio. Every document change is persisted in Sanity's hosted Content Lake and exposed via a GROQ-powered API.
n8n is an open-source workflow automation platform (think Zapier, but self-hostable and developer-friendly). It listens for events, queries APIs, transforms data, and calls external services — all through a visual node editor backed by real JavaScript.
Next.js is your frontend framework. With App Router and On-Demand ISR, it can revalidate specific pages or cache tags without a full rebuild, making near-instant publishing possible.
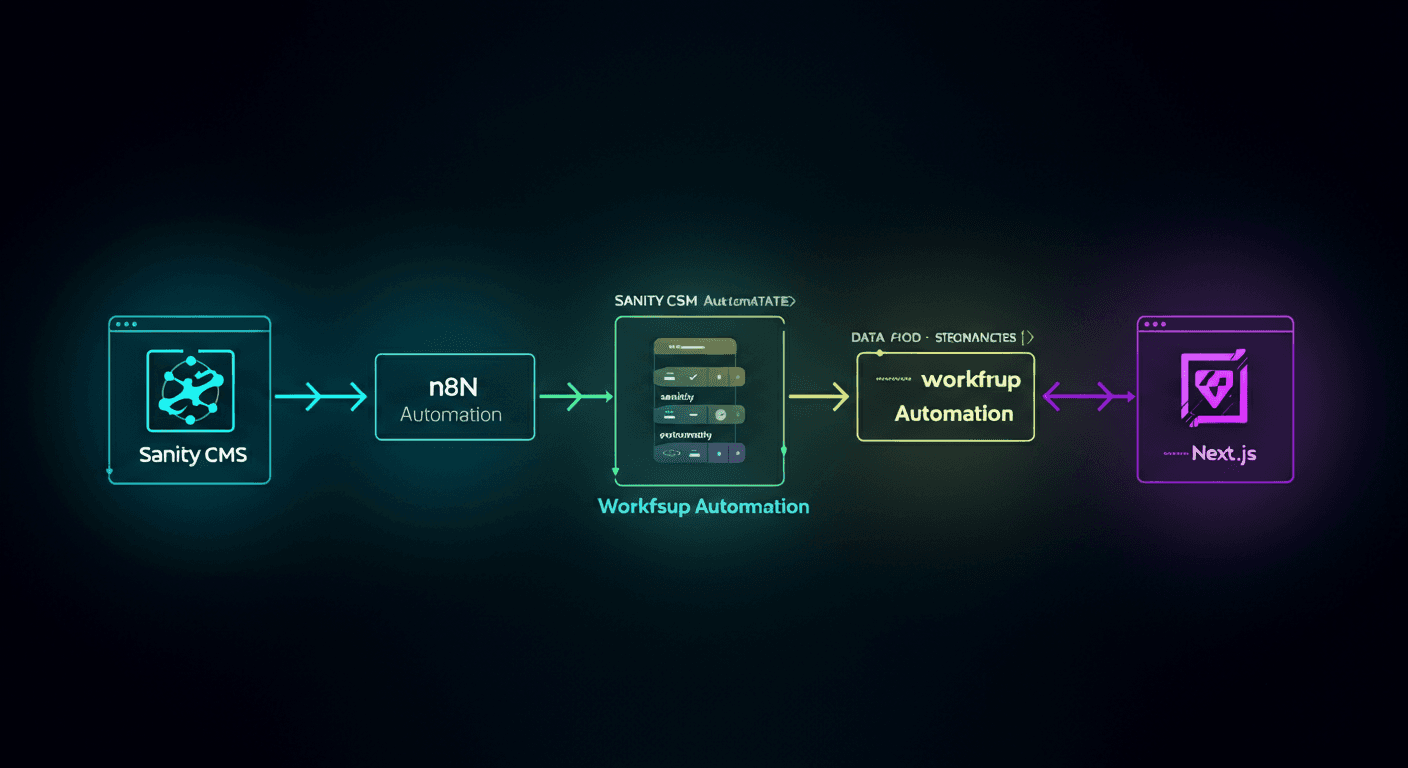
The data flow: an author edits a post in Sanity Studio → Sanity fires a webhook → the n8n Webhook node receives it → n8n fetches the full document via GROQ → an optional AI node enriches the content → n8n writes the enriched data back to Sanity → n8n calls the Next.js /api/revalidate endpoint → Next.js revalidates the affected page → the updated post is live. Each step is a discrete n8n node, making the pipeline easy to debug, extend, and version-control.
Setting Up the n8n Workflow
You have two hosting options. For a quick local start, run n8n via Docker: docker run -it --rm --name n8n -p 5678:5678 -v ~/.n8n:/home/node/.n8n n8nio/n8n, then visit http://localhost:5678. For production, n8n Cloud (n8n.io) is the recommended managed option.
To create the workflow: open the n8n editor, click New Workflow, and add a Webhook node as the trigger. Chain the following nodes: HTTP Request (fetch from Sanity) → Code (transform data) → HTTP Request (call Next.js revalidate). Save and activate the workflow.
To configure the Sanity webhook, go to your Sanity project dashboard under API → Webhooks and create a new entry. Set the URL to your n8n webhook URL, trigger on create and update events, and apply the filter _type == "post" && !(_id in path("drafts.**")) to ensure only published documents trigger the workflow. Add a shared secret for signature verification.
Connecting n8n to Sanity's API
Sanity exposes its Content Lake via a GROQ query API. From n8n, use an HTTP Request node to query it. First, generate a read token in Sanity Manage → API → Tokens and store it as an n8n credential — never hardcode it. In the HTTP Request node, add an Authorization header with the value Bearer {{$env.SANITY_READ_TOKEN}}.
A typical GROQ query to fetch a post by ID looks like: *[_type == "post" && _id == $id][0]{ _id, title, slug, body, publishedAt, "authorName": author->name }. URL-encode this and pass it as the query parameter to https://<projectId>.api.sanity.io/v2024-01-01/data/query/<dataset>.
Sanity wraps its response in a JSON envelope with a result key. Access the document in subsequent nodes via expressions like {{$json.result.slug.current}}.
To write data back to Sanity after AI enrichment, use the Mutations API: send a POST request to https://<projectId>.api.sanity.io/v2024-01-01/data/mutate/<dataset> with a write token and a mutations array containing a patch operation. For example, to set the SEO description: {"mutations": [{"patch": {"id": "<docId>", "set": {"seo.description": "<value>"}}}]}.
Triggering Next.js Revalidation via Webhook
Next.js On-Demand ISR lets you revalidate specific pages without a full rebuild. Create an API route at app/api/revalidate/route.ts that accepts a POST request, validates a shared secret from the x-revalidate-secret header, reads a slug or tag from the request body, and calls revalidatePath(`/blog/${slug}`) or revalidateTag(tag) from next/cache. Return a JSON response with {revalidated: true, now: Date.now()} on success.
In n8n, add an HTTP Request node after your Sanity fetch step. Set the method to POST, the URL to your site's revalidate endpoint, add the x-revalidate-secret header using {{$env.REVALIDATE_SECRET}}, and send a JSON body with the slug from the Sanity response: {"slug": "={{$json.result.slug.current}}", "tag": "posts"}. Next.js will immediately serve the fresh version of the page on the next request.
Adding AI Content Generation to the Pipeline
One of n8n's most powerful features is its native AI nodes. You can slot an OpenAI node between your Sanity fetch and your revalidation call to automatically draft or enhance content. Common use cases include: auto-generating an SEO meta description from the post body, suggesting a social media caption, translating a post into another language, or summarizing a long-form article into an excerpt.
To auto-generate an SEO description, add an OpenAI node (or an HTTP Request node pointing to the OpenAI Chat Completions API) with model gpt-4o-mini. Set the system prompt to: "You are an SEO expert. Write a compelling meta description of 120–160 characters for the following blog post. Return only the description text, no quotes." Set the user message to the expression ={{$json.result.title + "\n\n" + $json.result.excerpt}}. The node outputs the generated description, which you then pass to a Sanity Mutations API call to patch seo.description on the document before triggering revalidation.
Always store your OpenAI API key in n8n's credential store and reference it via the built-in OpenAI credential type. Never paste the key directly into a node's configuration field.
Scheduling and Approval Flows
For time-based publishing, replace the Webhook trigger with a Schedule trigger set to run every 5 minutes (or whatever cadence fits your team). The GROQ query should fetch posts where publishedAt <= now() && publishedLive != true. When the workflow finds a ready post, it sets a publishedLive flag on the Sanity document and triggers Next.js revalidation.
For editorial control, add a human-in-the-loop approval step. When n8n detects a post marked readyForReview: true in Sanity, it sends a Slack message (or email) with the post title, preview URL, and two buttons: Approve and Reject. Each button links to a unique n8n webhook URL that resumes the workflow. On Approve, the workflow patches approved: true in Sanity and triggers revalidation. On Reject, it patches approved: false and notifies the author. This pattern uses n8n's Wait node set to "On Webhook Call" to pause execution until the editor responds.
Common Mistakes
Avoid these pitfalls when building your automation pipeline:
- Missing webhook secrets. Always validate the
x-sanity-webhook-signatureheader (or your own shared secret) in n8n before processing. Without this, anyone who discovers your webhook URL can trigger arbitrary revalidations. - Not handling draft vs. published states. Sanity draft documents have IDs prefixed with
drafts.. If your GROQ filter doesn't exclude them, you'll publish incomplete content. Always filter with!(_id in path("drafts.**")). - Ignoring rate limits. Sanity's API has rate limits per plan. If you have a high-volume site, batch your GROQ queries and add a Wait node between bulk operations to avoid hitting the ceiling.
- No error handling in n8n. By default, a failed node stops the workflow silently. Add Error Trigger workflows and connect them to a Slack or email alert so failures don't go unnoticed.
- Hardcoding secrets. Never put API tokens, webhook secrets, or database URLs directly in n8n node configurations. Use n8n's built-in Credentials system or environment variables (
$env.MY_SECRET).
Best Practices
Follow these guidelines to build a robust, maintainable pipeline:
- Make workflows idempotent. Running the same workflow twice for the same document should produce the same result. Use Sanity's
createOrReplaceorpatchmutations rather thancreate, and check for existing data before overwriting. - Store secrets in environment variables. Use n8n's credential store or environment variables. Rotate tokens regularly and scope them to the minimum required permissions — read-only tokens for fetching, write tokens only where needed.
- Add structured logging. Use n8n's Code nodes to emit structured log entries (JSON with
timestamp,workflowId,documentId,status). Ship these to a log aggregator like Datadog or Logtail for full observability. - Test with a dry-run mode. Add a boolean
DRY_RUNenvironment variable. Whentrue, the workflow fetches and transforms data but skips the Sanity write and Next.js revalidation calls. This lets you safely test changes in production without side effects. - Version-control your workflows. Export n8n workflows as JSON and commit them to your repository. This gives you a change history, enables code review, and makes disaster recovery straightforward.
FAQ
Do I need to self-host n8n, or can I use the cloud version?
Both work. n8n Cloud is easier to set up and maintain, and it's the recommended starting point. Self-hosting with Docker gives you full control over data residency and costs, which matters for high-volume or compliance-sensitive use cases.
Will this approach work with Next.js Pages Router, or only App Router?
On-Demand ISR with revalidatePath and revalidateTag requires the App Router (Next.js 13.4+). For Pages Router, use res.revalidate('/blog/my-post') inside an API route — the n8n HTTP Request call is identical; only the Next.js handler changes.
How do I handle images in the automated pipeline?
Sanity stores image asset references, not raw files. Your Next.js frontend should use @sanity/image-url to build optimized image URLs at render time. The automation pipeline doesn't need to move image files — just ensure the mainImage.asset._ref field is populated in the Sanity document before revalidation.
What happens if the n8n workflow fails mid-run?
n8n logs the error and stops execution at the failed node. The Sanity document remains unchanged, and Next.js is not revalidated. Set up an Error Trigger workflow to send an alert (Slack, email, PagerDuty) with the workflow ID and error message so you can investigate and re-run manually.
Can I use this pipeline with a monorepo that has multiple Next.js sites?
Yes. Add a field to your Sanity post schema (e.g., targetSite) and use a Switch node in n8n to route the revalidation call to the correct site's API endpoint based on that field value.
Conclusion
Manual blog publishing is a solved problem. With Sanity as your content lake, n8n as your automation engine, and Next.js as your frontend, you can build a pipeline that takes a post from "ready to review" to "live on the web" in seconds — with optional AI enrichment, human approval gates, and full observability along the way.
Here's a quick recap of what you've learned:
- Why automating blog publishing saves time, reduces errors, and scales your content operation
- How Sanity, n8n, and Next.js fit together in a clean data-flow architecture
- How to configure Sanity webhooks, n8n workflows, and Next.js On-Demand ISR
- How to add AI-powered content enhancement with an OpenAI node in n8n
- How to implement scheduled publishing and human-in-the-loop approval flows
- The most common mistakes and best practices for production-grade pipelines
The best time to automate your publishing workflow was when you set up your blog. The second best time is today. Start with a single n8n workflow that triggers Next.js revalidation on Sanity publish events — you'll have it running in under an hour — and build from there.