Sanity
How to Build a RAG App with Next.js and a Vector Database
Learn to build a Next.js RAG app from scratch—vector embeddings, retrieval API routes, LLM integration, and a chat UI—deployed to Vercel in one complete tutorial.
Retrieval-Augmented Generation (RAG) has quickly become the go-to architecture for building AI-powered applications that need to answer questions grounded in your own data. Instead of relying solely on a large language model's pre-trained knowledge, RAG retrieves relevant context from a vector database at query time and feeds it to the model — dramatically reducing hallucinations and keeping answers up to date.
In this tutorial you will build a fully functional Next.js RAG app from scratch. You will set up a vector database, generate and store embeddings, expose a retrieval API route, wire up an LLM, and ship a streaming chat UI — all deployed to Vercel. Every step includes TypeScript code you can copy directly into your project.
What You Will Build
By the end of this guide you will have a production-ready Next.js RAG application with the following capabilities:
- Document ingestion pipeline — reads text files or markdown documents, chunks them, generates embeddings with OpenAI's
text-embedding-3-smallmodel, and upserts them into a vector database. - Retrieval API route — a Next.js App Router route handler (
/api/chat) that embeds the user's query, fetches the top-k most similar chunks, and passes them as context to an LLM. - Streaming chat UI — a React component that streams the LLM response token-by-token using the Vercel AI SDK.
- Vercel deployment — environment variable configuration and edge-runtime compatibility so the whole stack deploys in one
git push.
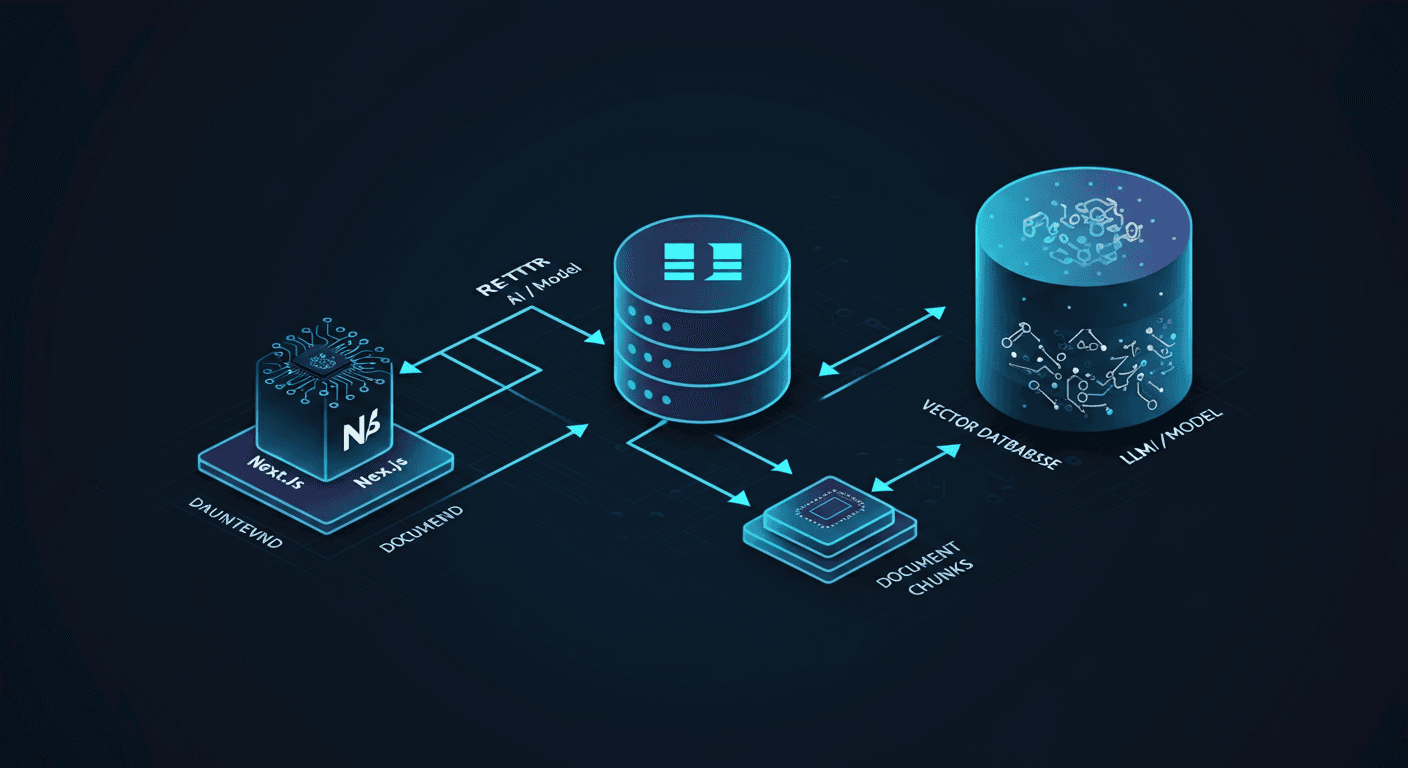
The finished architecture looks like this: user message → embed query → vector search → inject context → LLM → stream response → UI. Prerequisites: Node.js 18+, an OpenAI API key, and a free account on either Pinecone or Upstash.
Next.js Project Setup
Start by scaffolding a new Next.js 14 project with the App Router and TypeScript enabled:
npx create-next-app@latest rag-app --typescript --tailwind --eslint --app
cd rag-app
Next, install the core dependencies you will need throughout the tutorial:
npm install ai openai @pinecone-database/pinecone
# or, if you prefer Upstash:
npm install ai openai @upstash/vector
The ai package is the Vercel AI SDK, which provides streaming utilities and React hooks. openai is the official OpenAI Node.js client. The vector database SDK depends on your choice — we cover both Pinecone and Upstash in the next section.
Create a .env.local file at the project root and add your secrets:
OPENAI_API_KEY=sk-...
PINECONE_API_KEY=...
PINECONE_INDEX=rag-index
# or for Upstash:
UPSTASH_VECTOR_REST_URL=https://...
UPSTASH_VECTOR_REST_TOKEN=...
Never commit .env.local to version control. Add it to .gitignore if it is not already there.
Finally, create a lib/ directory at the project root. This is where you will place shared utilities for the OpenAI client, the vector database client, and the chunking logic:
mkdir -p lib scripts
Your initial project structure should look like this:
rag-app/
├── app/
│   ├── api/
│   │   └── chat/
│   │       └── route.ts
│   ├── page.tsx
│   └── layout.tsx
├── lib/
│   ├── openai.ts
│   ├── vectordb.ts
│   └── chunker.ts
├── scripts/
│   └── ingest.ts
└── .env.local
Choosing a Vector Database (Pinecone/Upstash)
A vector database stores high-dimensional embedding vectors and supports approximate nearest-neighbour (ANN) search. Two excellent managed options work seamlessly with Next.js and Vercel.
Pinecone is the most widely used managed vector database. It offers a generous free tier (one index, 100k vectors), a REST API, and a Node.js SDK that works in both Node.js and edge runtimes. Pinecone is a great choice when you need advanced metadata filtering or plan to scale to millions of vectors.
Upstash Vector is a serverless vector database built on top of Upstash's Redis-compatible infrastructure. It has a pay-per-request pricing model with a free tier, and its SDK is edge-runtime compatible out of the box — making it a natural fit for Vercel Edge Functions.
Create the vector database client in lib/vectordb.ts. The file exports a single client function so the rest of the codebase stays database-agnostic:
// lib/vectordb.ts
import { Pinecone } from '@pinecone-database/pinecone';

let pineconeClient: Pinecone | null = null;

export function getPineconeClient(): Pinecone {
  if (!pineconeClient) {
    pineconeClient = new Pinecone({
      apiKey: process.env.PINECONE_API_KEY!,
    });
  }
  return pineconeClient;
}

export function getPineconeIndex() {
  const client = getPineconeClient();
  return client.index(process.env.PINECONE_INDEX!);
}
If you chose Upstash, replace the contents with:
// lib/vectordb.ts (Upstash variant)
import { Index } from '@upstash/vector';

export function getUpstashIndex() {
  return new Index({
    url: process.env.UPSTASH_VECTOR_REST_URL!,
    token: process.env.UPSTASH_VECTOR_REST_TOKEN!,
  });
}
Both clients are lazy-initialised to avoid creating new connections on every hot-reload during development. Before you can upsert vectors, you need to create the index. For Pinecone, do this once via the SDK:
// Run once: npx ts-node scripts/create-index.ts
import { getPineconeClient } from '../lib/vectordb';

async function createIndex() {
  const client = getPineconeClient();
  await client.createIndex({
    name: process.env.PINECONE_INDEX!,
    dimension: 1536, // text-embedding-3-small output dimension
    metric: 'cosine',
    spec: { serverless: { cloud: 'aws', region: 'us-east-1' } },
  });
  console.log('Index created.');
}

createIndex();
Upstash creates the index automatically on first upsert, so no extra step is needed.
Generating and Storing Embeddings
Embeddings are dense numerical representations of text. Semantically similar pieces of text have vectors that are close together in high-dimensional space — which is exactly what makes vector search work.
First, create the OpenAI client singleton in lib/openai.ts:
// lib/openai.ts
import OpenAI from 'openai';

let openaiClient: OpenAI | null = null;

export function getOpenAIClient(): OpenAI {
  if (!openaiClient) {
    openaiClient = new OpenAI({
      apiKey: process.env.OPENAI_API_KEY!,
    });
  }
  return openaiClient;
}

export async function embedText(text: string): Promise<number[]> {
  const client = getOpenAIClient();
  const response = await client.embeddings.create({
    model: 'text-embedding-3-small',
    input: text,
  });
  return response.data[0].embedding;
}
Next, write the text chunker in lib/chunker.ts. Chunking splits long documents into smaller pieces so each vector represents a focused, retrievable unit of information:
// lib/chunker.ts
export interface TextChunk {
  id: string;
  text: string;
  metadata: Record<string, string>;
}

export function chunkText(
  text: string,
  source: string,
  chunkSize = 500,
  overlap = 50
): TextChunk[] {
  const words = text.split(/\s+/);
  const chunks: TextChunk[] = [];
  let i = 0;

  while (i < words.length) {
    const chunk = words.slice(i, i + chunkSize).join(' ');
    chunks.push({
      id: `${source}-chunk-${chunks.length}`,
      text: chunk,
      metadata: { source, chunkIndex: String(chunks.length) },
    });
    i += chunkSize - overlap;
  }

  return chunks;
}
A chunk size of 500 words with a 50-word overlap is a solid starting point. The overlap ensures that sentences split across chunk boundaries are still retrievable.
Now write the ingestion script in scripts/ingest.ts. This script reads documents from a docs/ directory, chunks them, embeds each chunk, and upserts the vectors:
// scripts/ingest.ts
import fs from 'fs';
import path from 'path';
import { embedText } from '../lib/openai';
import { chunkText } from '../lib/chunker';
import { getPineconeIndex } from '../lib/vectordb';

const DOCS_DIR = path.join(process.cwd(), 'docs');

async function ingest() {
  const files = fs.readdirSync(DOCS_DIR)
    .filter((f) => f.endsWith('.md') || f.endsWith('.txt'));

  for (const file of files) {
    const text = fs.readFileSync(path.join(DOCS_DIR, file), 'utf-8');
    const chunks = chunkText(text, file);
    console.log(`Processing ${file}: ${chunks.length} chunks`);

    const index = getPineconeIndex();
    const batchSize = 100;

    for (let i = 0; i < chunks.length; i += batchSize) {
      const batch = chunks.slice(i, i + batchSize);
      const vectors = await Promise.all(
        batch.map(async (chunk) => ({
          id: chunk.id,
          values: await embedText(chunk.text),
          metadata: { ...chunk.metadata, text: chunk.text },
        }))
      );
      await index.upsert(vectors);
      console.log(`  Upserted batch ${Math.floor(i / batchSize) + 1}`);
    }
  }
  console.log('Ingestion complete.');
}

ingest().catch(console.error);
Run the ingestion script with npx ts-node --esm scripts/ingest.ts after placing your source documents in the docs/ directory. For large document sets, consider rate-limiting your embedding API calls to stay within OpenAI's requests-per-minute limits.
Building the Retrieval API Route
The retrieval API route is the heart of the RAG pipeline. It receives the user's message, embeds it, queries the vector database for the most relevant chunks, and returns them alongside the LLM's response.
Create the route handler at app/api/chat/route.ts:
// app/api/chat/route.ts
import { openai } from '@ai-sdk/openai';
import { streamText } from 'ai';
import { embedText } from '@/lib/openai';
import { getPineconeIndex } from '@/lib/vectordb';

export const runtime = 'nodejs';

export async function POST(req: Request) {
  const { messages } = await req.json();

  // Extract the latest user message
  const userMessage = messages[messages.length - 1]?.content as string;
  if (!userMessage) {
    return new Response('No message provided', { status: 400 });
  }

  // 1. Embed the user query
  const queryEmbedding = await embedText(userMessage);

  // 2. Retrieve top-5 relevant chunks from the vector database
  const index = getPineconeIndex();
  const queryResult = await index.query({
    vector: queryEmbedding,
    topK: 5,
    includeMetadata: true,
  });

  const context = queryResult.matches
    .map((match) => match.metadata?.text as string)
    .filter(Boolean)
    .join('\n\n---\n\n');

  // 3. Build the system prompt with retrieved context
  const systemPrompt = `You are a helpful assistant. Answer the user's
question using ONLY the context provided below. If the answer is not
in the context, say you don't know.\n\nContext:\n${context}`;

  // 4. Stream the LLM response
  const result = await streamText({
    model: openai('gpt-4o-mini'),
    system: systemPrompt,
    messages,
  });

  return result.toDataStreamResponse();
}
A few important design decisions here:
topK: 5— retrieving five chunks is a good balance between context richness and token cost. Increase this for complex queries; decrease it for speed.includeMetadata: true— you need the storedtextfield from the metadata to reconstruct the context string.runtime = 'nodejs'— the Pinecone SDK requires the Node.js runtime. If you use Upstash, you can switch to'edge'for lower cold-start latency.- The system prompt explicitly instructs the model to answer only from the provided context, which is the key RAG constraint that prevents hallucination.
Connecting to LLM
The Vercel AI SDK's streamText function abstracts over multiple LLM providers. In the route above you used gpt-4o-mini, but swapping providers requires only a one-line change.
First, install the AI SDK's OpenAI provider:
npm install @ai-sdk/openai
The openai() function from @ai-sdk/openai automatically reads OPENAI_API_KEY from the environment. You can also pass a custom baseURL to use OpenAI-compatible APIs like Groq or Together AI:
import { createOpenAI } from '@ai-sdk/openai';

const groq = createOpenAI({
  baseURL: 'https://api.groq.com/openai/v1',
  apiKey: process.env.GROQ_API_KEY!,
});

// Then use: model: groq('llama3-70b-8192')
For production RAG applications, consider these model selection guidelines:
gpt-4o-mini— best cost-to-quality ratio for most RAG use cases. Fast, cheap, and handles long context windows well.gpt-4o— use when answer quality is critical and you can afford higher latency and cost.claude-3-haiku(via@ai-sdk/anthropic) — excellent for high-throughput applications with strict latency budgets.
You can also add a maxTokens cap and a temperature setting to the streamText call to control response length and creativity:
const result = await streamText({
  model: openai('gpt-4o-mini'),
  system: systemPrompt,
  messages,
  maxTokens: 1024,
  temperature: 0.2, // Lower = more factual, less creative
});
A low temperature (0.1–0.3) is recommended for RAG applications because you want the model to stay close to the retrieved facts rather than improvising.
Building the Chat UI
With the API route in place, you can now build the streaming chat interface. The Vercel AI SDK's useChat hook handles streaming, message state, and form submission out of the box.
Replace the contents of app/page.tsx with the following:
'use client';

import { useChat } from 'ai/react';
import { useRef, useEffect } from 'react';

export default function ChatPage() {
  const { messages, input, handleInputChange, handleSubmit, isLoading } =
    useChat({ api: '/api/chat' });

  const bottomRef = useRef<HTMLDivElement>(null);

  useEffect(() => {
    bottomRef.current?.scrollIntoView({ behavior: 'smooth' });
  }, [messages]);

  return (
    <main className="flex flex-col h-screen max-w-2xl mx-auto p-4">
      <h1 className="text-2xl font-bold mb-4">RAG Chat</h1>
      <div className="flex-1 overflow-y-auto space-y-4 mb-4">
        {messages.map((message) => (
          <div
            key={message.id}
            className={`p-3 rounded-lg ${
              message.role === 'user'
                ? 'bg-blue-100 ml-8 text-right'
                : 'bg-gray-100 mr-8'
            }`}
          >
            <p className="text-sm font-semibold capitalize mb-1">
              {message.role}
            </p>
            <p className="text-sm whitespace-pre-wrap">{message.content}</p>
          </div>
        ))}
        {isLoading && (
          <div className="bg-gray-100 mr-8 p-3 rounded-lg">
            <p className="text-sm text-gray-500 animate-pulse">Thinking...</p>
          </div>
        )}
        <div ref={bottomRef} />
      </div>
      <form onSubmit={handleSubmit} className="flex gap-2">
        <input
          value={input}
          onChange={handleInputChange}
          placeholder="Ask a question about your documents..."
          className="flex-1 border rounded-lg px-3 py-2 text-sm"
          disabled={isLoading}
        />
        <button
          type="submit"
          disabled={isLoading || !input.trim()}
          className="bg-blue-600 text-white px-4 py-2 rounded-lg text-sm"
        >
          Send
        </button>
      </form>
    </main>
  );
}
The useChat hook automatically sends the full conversation history to /api/chat on each submission, which allows the LLM to maintain conversational context across turns. The isLoading flag drives the disabled state of the input and button, preventing duplicate submissions.
For a more polished experience, consider adding markdown rendering with react-markdown so the LLM's formatted responses render correctly:
npm install react-markdown
import ReactMarkdown from 'react-markdown';

// Replace the content paragraph with:
<ReactMarkdown className="text-sm prose prose-sm max-w-none">
  {message.content}
</ReactMarkdown>
Deploying to Vercel
Vercel is the natural deployment target for Next.js applications, and it handles environment variables, serverless functions, and edge runtimes with minimal configuration.
Step 1: Push to GitHub. Initialise a git repository and push your code:
git init
git add .
git commit -m "Initial RAG app"
git remote add origin https://github.com/your-username/rag-app.git
git push -u origin main
Step 2: Import the project in Vercel. Go to vercel.com, click Add New Project, and import your GitHub repository. Vercel will auto-detect the Next.js framework.
Step 3: Add environment variables. In the Vercel project settings under Environment Variables, add all the keys from your .env.local file: OPENAI_API_KEY, PINECONE_API_KEY, and PINECONE_INDEX. Set them for Production, Preview, and Development environments as appropriate.
Step 4: Deploy. Click Deploy. Vercel will build and deploy your application. Subsequent pushes to main will trigger automatic redeployments.
Edge runtime considerations: If you switch to Upstash and set runtime = 'edge' in your route handler, be aware that the Node.js fs module is not available in the edge runtime. Keep the ingestion script as a standalone Node.js script and only run it locally or in a CI pipeline.
Function timeout: By default, Vercel Hobby plan serverless functions time out after 10 seconds. If your vector search + LLM call exceeds this, upgrade to the Pro plan (60-second timeout) or switch to streaming edge functions, which have a 30-second limit but start streaming immediately.
Common Mistakes
Building RAG applications involves several non-obvious pitfalls. Here are the most common ones and how to avoid them.
1. Chunking too aggressively or not enough. Chunks that are too small lose context; chunks that are too large dilute relevance. Start with 300–600 words and tune based on your retrieval quality.
2. Not storing the original text in metadata. If you only store the vector and an ID, you cannot reconstruct the context string at query time. Always store the raw text field in the vector's metadata.
3. Using the wrong embedding model for retrieval. You must use the same embedding model for both ingestion and query-time embedding. Mixing text-embedding-ada-002 for ingestion with text-embedding-3-small for queries will produce garbage results.
4. Ignoring token limits. Concatenating five 500-word chunks can easily exceed 2,000 tokens of context. Add the system prompt and conversation history and you may hit the model's context window. Always count tokens before sending and truncate if necessary.
5. Not filtering by metadata. If your knowledge base contains documents from multiple sources or tenants, always add a metadata filter to your vector query to avoid cross-contaminating results:
const queryResult = await index.query({
  vector: queryEmbedding,
  topK: 5,
  includeMetadata: true,
  filter: { source: { $eq: 'product-docs' } }, // Pinecone filter syntax
});
6. Hardcoding API keys. Never hardcode secrets in source files. Always use environment variables and verify they are excluded from version control.
7. Re-embedding on every request. If users ask the same question repeatedly, cache the query embedding in Redis or a similar store to reduce latency and API costs.
Best Practices
Following these practices will make your Next.js RAG app more reliable, maintainable, and cost-efficient.
Use semantic chunking when possible. Instead of splitting by word count, split on natural boundaries like paragraphs, headings, or sentences. Libraries like LangChain's RecursiveCharacterTextSplitter respect these boundaries automatically.
Add a re-ranking step. After retrieving the top-k chunks, run them through a cross-encoder re-ranker (e.g., Cohere Rerank) to re-order them by true relevance before injecting into the prompt. This significantly improves answer quality.
Implement hybrid search. Combine vector similarity search with keyword (BM25) search and merge the results. Pinecone supports sparse-dense hybrid search natively. This catches cases where exact keyword matches are more relevant than semantic similarity.
Version your embeddings. When you upgrade your embedding model, you need to re-embed and re-index all documents. Track the embedding model version in your vector metadata so you can identify stale vectors.
Monitor retrieval quality. Log the retrieved chunks alongside the user query and the final answer. Periodically review these logs to identify cases where retrieval failed — this is the fastest way to improve your RAG pipeline.
Use streaming for all LLM calls. Streaming dramatically improves perceived performance. Users see the first token in under a second rather than waiting for the full response. The Vercel AI SDK makes this trivial with streamText and useChat.
Implement graceful fallbacks. If the vector database is unavailable or returns no results, fall back to a general-purpose system prompt rather than returning an error. Always handle the empty-context case explicitly in your system prompt.
FAQ
What is the difference between RAG and fine-tuning?
Fine-tuning bakes knowledge into the model's weights by training on your data, which is expensive, slow to update, and risks catastrophic forgetting. RAG retrieves knowledge at inference time from an external store, making it cheap to update (just re-index new documents), transparent (you can inspect what was retrieved), and less prone to hallucination on factual queries. For most production use cases, RAG is the right default choice.
How many chunks should I retrieve (topK)?
Start with topK: 5. Retrieve more chunks (up to 10–15) if your questions require synthesising information from multiple sources. Retrieve fewer (3) if you need to minimise token costs or latency. Always measure the impact on answer quality empirically — there is no universally optimal value.
Can I use a local embedding model instead of OpenAI?
Yes. Models like nomic-embed-text (via Ollama) or all-MiniLM-L6-v2 (via Hugging Face Transformers.js) run entirely locally. The trade-off is lower embedding quality compared to OpenAI's latest models and higher infrastructure complexity. For a Next.js app deployed to Vercel, a hosted embedding API is almost always the simpler choice.
How do I keep the vector database in sync with my source documents?
Implement a webhook or scheduled job that detects document changes (create, update, delete) and triggers the ingestion pipeline. For deletions, use the vector database's deleteOne or deleteMany API with the document's ID prefix. For updates, delete the old vectors and upsert the new ones. Tools like Sanity's GROQ-powered webhooks or GitHub Actions make this straightforward to automate.
Is this architecture suitable for multi-tenant applications?
Yes, with proper namespace or metadata isolation. Pinecone supports namespaces — each tenant gets their own namespace, and queries are scoped to that namespace. Upstash Vector supports namespaces as well. Alternatively, store a tenantId field in every vector's metadata and include it as a mandatory filter on every query. Never allow cross-tenant retrieval.
Conclusion
You have now built a complete Next.js RAG application — from document ingestion and vector storage through retrieval, LLM integration, and a streaming chat UI, all the way to a Vercel deployment. The architecture you have implemented is production-ready and scales gracefully: swap the embedding model, change the LLM provider, or migrate vector databases with minimal code changes thanks to the clean abstractions in lib/.
The most important thing to remember is that RAG quality is primarily a retrieval problem, not a generation problem. Invest time in your chunking strategy, experiment with topK, add re-ranking, and monitor what gets retrieved. A well-tuned retrieval pipeline will outperform a more powerful LLM with poor retrieval every time.
From here, consider exploring agentic RAG — where the LLM decides whether to retrieve, what query to use, and whether to retrieve again based on the initial results. Libraries like LangGraph and the Vercel AI SDK's tool-calling primitives make this pattern accessible without leaving the Next.js ecosystem.